JPEGs – Pros and Cons of this file format

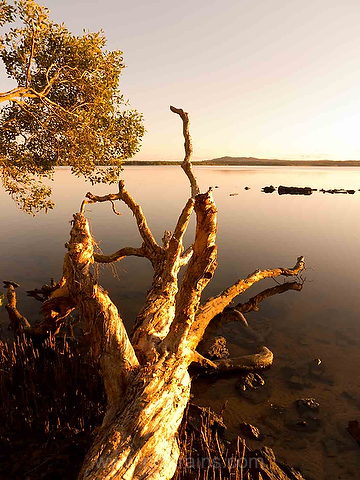
Lake Weyba, Noosa. Lumix LX5 1/160 second @f4 ISO100. This file was compressed to JPEG Quality 8 for delivery to a magazine’s designer and reproduced just fine.
It was brought to my attention recently (by a reader actually) that I frequently bang on about raw shooting – I think the term used was ‘raw evangelism’ – and that I make some photographers feel marginalised if they shoot JPEGs. It was an interesting point of view and so I thought it would be interesting to look at what JPEGs really are, why they can indeed be useful and how to get the most out of them.
JPEG is an acronym for Joint Photographic Experts Group, the name of the committee that created the JPEG standard. The first JPEG standard was issued in 1992 and confirmed under ISO/IEC 10918-1 in 1994. The format is intended for use on images with continuous, smoothly varying tones such as photographs and paintings and is not suited for line art and diagrams.
Because the JPEG format includes what’s known as ‘lossy compression’ it is best used as a ‘once only’ format either direct out of a digital camera or as a delivery medium for finished images. It should never be used as an editing format with re-saves as repeated compression will quickly destroy the image’s fidelity.
Variable File Sizes
There is also a direct correlation between the compressed file size and the image quality – since the JPEG format does throw away information it follows that the more it is compressed the more information is lost and at some point this will be visible in the image. It is quite remarkable just how much an image can be compressed with no visible loss of quality, it’s quite feasible to compress a file to 1/10th of it’s uncompressed size with very little visible loss.
Not all JPEG ‘saves’ are the same either. Different implementations can results in quite different results. I saved an 8.7MB TIFF at 80% (High) Quality settings with no embedded profile in Photoshop using ‘Save for Web’ and ‘Save As’, plus the same file exported at 80% Quality in Adobe Fireworks. The results were visually almost identical but Fireworks produced a slightly smoother file. Not only that but the file size was 705KB from Fireworks as opposed to 1.6MB using Photoshop Save for Web and 811KB using Photoshop Save As.
The lesson here is to use Fireworks as a JPEG export tool if final file size is critical, as it will do a better job in half the file size. Quite remarkable really.
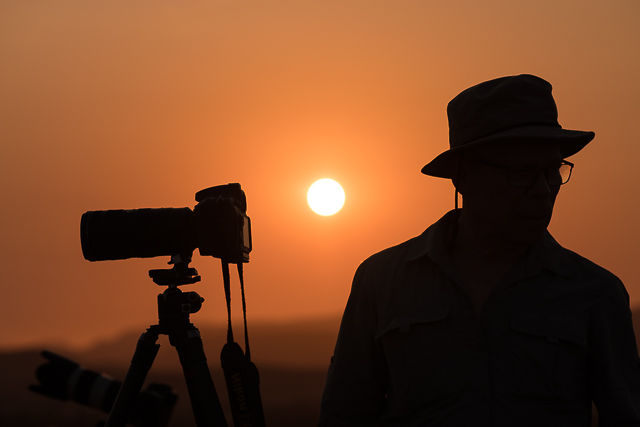
One other aspect of compression that sometimes confuses people is that the resulting file size is very dependant on subject matter. Compression works best on large smooth areas of minimal detail, like skies. An image of a forest with fine organic details will be much harder to compress and might only be ¼ the size of the original at Quality 8 whilst a sillhouette agaist a sunset might compress to 1/20 the size, still on Quality 8. When you save a batch of images for the web it is quite usual to see great variations of file size, even through all the images are, say, 800x500px. This is entirely due to differing subject matter.
How much Compression?
JPEG compression uses native RGB as a colourspace on maximum quality but if you go below this the data is converted to a working space called YCC – Y is brightness and the two Cs are Chroma channels. It’s a bit like L*AB mode. The reason for this change is that the human eye is very good at detecting subtle changes in brightness but relatively poor at seeing small changes in hue and saturation.
The resolution of these two colour channels can be halved with virtually no visual loss of image quality. This is called Chroma Subsampling and can be 4:4:4 (no down sampling, 4:2:2 (halved in horizontal direction only) or 4:2:0 (halved in both directions). The eye is more sensitive to vertical details so halving the horizontal resolution can pass undetected.
Images are also broken down into blocks of 8×8 pixels – known as block splitting. This bit is quite technical and beyond the scope of this article, it involves cosine transformations, frequency domains and quantisation matrixes. I don’t pretend to understand any of this so I’ll trust the clever folks in the JPEG committee to work all this out.
What is interesting from a practical point of view is that if the image is not a multiple of 8 pixels wide and high then there will be blocks that are not complete. Heavy compression of this size of file, particularly if there is an edge border, can lead to edge fringing.
I did some tests and found that you can use quality settings down to about 50% before objectionable artifacts start appearing. These usually show up worst around hard boundaries of different strong colours and where thin lines change direction sharply – ie text. Diagonal lines can become jagged and smooth sky tones will start to show a slight patchiness. Given that many web images are only 800px wide and that the block splitting results in 8px blocks it’s obvious that having only 10 blocks across the image can easily result in artifacting.
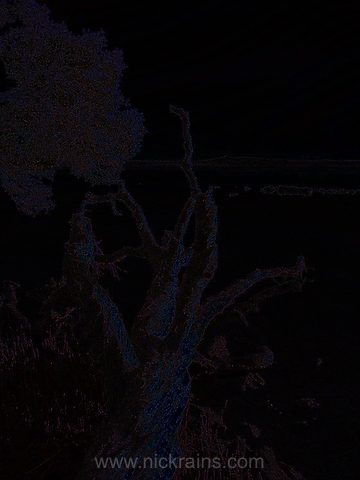
This image is made up of two layers – the original TIFF and a heavily compressed JPEG saved from the same file. The layers are blended using Difference blend mode to show the changes in the files.
Heavily compressed to show how the fine details look OK but the sky has heavy banding.
JPEGs in Use
JPEGs have a valuable role to play in digital photography as they are easy to work with, small in size, quick to deliver and fast to shoot.
Pros:
Small file size. Canon 5D MarkII Large Fine JPEG approx. 5MB: raw file size approx. 25MB. This means a card will hold five times as many images.
Higher burst capacity. The Canon 5D MarkII will shoot 78 large Fine JPEGs before the internal buffer fills up. In raw mode this is limited to 13.
Fast delivery. If you need to get the shots out to a client real fast you may not have time to process raws.
Compatibilty. Most software applications recognise JPEGs. Try dropping a raw file into MS Word!
So if you are a news shooter, or a sports shooter the above aspects will be very valuable.
Cons:
Limited bit depth. Jpegs are 8 bit only and can record only 256 distinct tones in each channel. Raw files can record at least 4096 per channel. If you do even modest post-processing, raw files will give you more room to move.
Control. Data is processed by far less sophisticated software in-camera, four or five crude sliders cannot compare with the vast number of adjustments available in a decent raw processor.
Output. Out of camera JPEGs are ‘baked’, sharpening cannot be reversed.
White balance. It’s critical to set the correct white balance in-camera. Photoshop cannot fully correct a wrongly set white balance after the fact.
Conclusion
If you have fully considered both sides of the situation, and have concluded that you need to shoot JPEGs then this is the right way to go. If you do not have a pressing need to shoot JPEGs then consider setting the camera to RAW+JPEG mode to have the best of both worlds, or just ditch the JPEGs and shoot raw. I call raw shooting ‘data capture’ – collect as much data as you can in the field and massage this data later on. If you want finished images out of the camera, this is fine too but just be away of the limitations.
TIP; If you want to post process out of camera JPEG files, save the files as 16bit TIFFs in Photoshop as a first step before doing any work on them. This will give you the best chance of getting good results. Only save out as a JPEG as a final step for delivery.
TIP: Test the different Picture Style and JPEG compression settings in the camera menus to see what effect they have on the images and adjust to suit your preferred subject types.
TIP: Choose a low sharpness setting in the camera and do a final sharpen later.
TIP: If you have Lightroom 3 you can actually fix the colour balance of JPEGs, not perfectly but better than nothing. LR3 can open and adjust JPEGs and TIFFs, and the white balance settings will work – consider this a ‘Get out of Jail’ card if you shoot a JPEG with the wrong white balance setting.
TIP : The Save Dialogue in Photoshop allows you to chose compression settings and gives you an estimate of the final file size. Avoid Level 7 Quality. Chroma Subsampling starts at 6 or below. For various reasons 7 is a very inefficient setting – choose 6 or 8 instead.
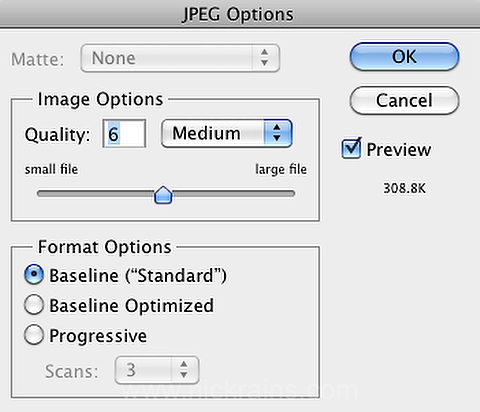
*Progressive means that the image will gradually appear as it downloads in a web browser.
*Baseline Standard is recognised by all web browsers.
*Baseline (Optimised) can save 2-6% on file size but is not recognised by all browsers.