Ten Tips For Getting Sharp Images

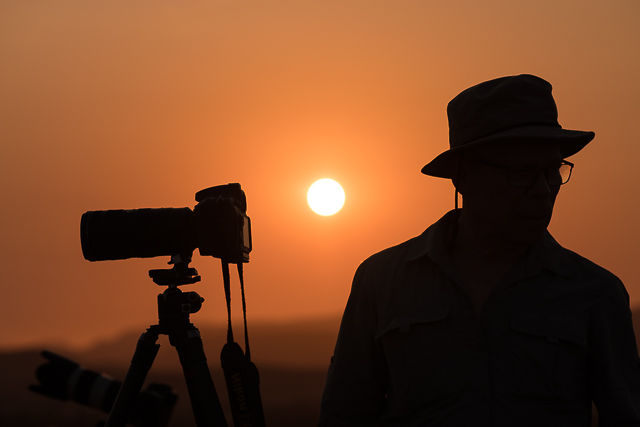
Low light in the rainforests of Papua New Guinea demands accurate focussing and a steady hand to get a tack sharp image. Leica S2 120mm Macro, 1/125 sec @f2.8 ISO640
Having a great camera with top notch lenses is all very well – they all have the potential to give you excellent image quality – but you still need to make sure that your shooting techniques allow the camera to perform to the best of its ability. Here are ten tips for getting sharp images, in no particular order of importance, to help you squeeze the maximum sharpness out of your equipment.
1. Only the absolute best lenses are capable of critically sharp images at the widest apertures.
Unless you are working with the finest glass from companies like Schneider, Rodenstock, Leica and Zeiss, it’s worth avoiding the widest apertures as this will often lead to a drop-off of resolution and contrast. Modestly priced zooms will almost always give you slightly soft results if used at f3.5 (or whatever the widest aperture is). Primes (fixed focal length) from the top manufacturers are less affected by this, and the high end pro lenses will often show virtually no difference between wide open and f8 for example.
2. High resolution sensors demand accurate focussing.
Almost all DSLRs these days contain sensors of 14mp or more, enough resolution to reveal the slightest of focussing errors. Making sure your camera is correctly focussed is more important that ever, and cameras that have a Live View capability offer a means to nail that focus by showing you a magnified version of hat the sensor is actually ‘seeing’. If it looks focussed using Live View, then you can be sure it is focussed. This cannot be said of focussing manually by eye or even using the ever-increasingly sophisticated AF facilities of modern cameras.
Auto Focus (AF) may or may not be up to the task for critical focussing. Certainly it works faster than most people can manually focus, but as to accuracy, well it depends on a lot of factors.
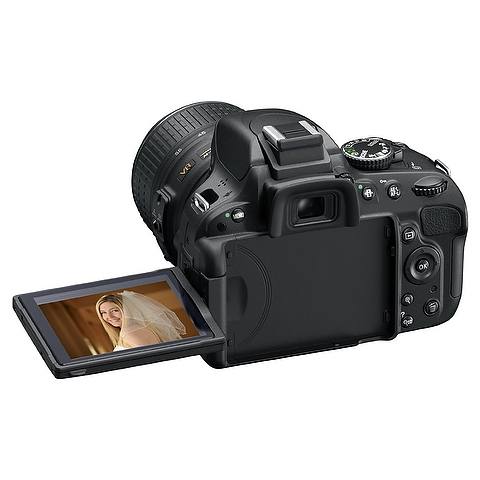
Using Live View means you can be sure your focus is spot on. The tilt screen on this Nikon D5100 makes using Live View even more convenient.
3. Use the centre AF point for maximum accuracy.
Whilst lots of modern cameras have multiple focus points, the centre one is often the most accurate. That’s because it is often a cross-type (CT) sensor, detecting contract in both a horizontal and vertical direction. Surrounding sensors are often one or the other, not both, and are thus slightly less accurate. The centre point also works better in lower light, which could mean low ambient light or a slow lens (one with an f-stop of f4 or above) which lets in less light than a fast lens. Lenses with apertures of f2.8 or wider let in more light and the focus sensor will do a better job as a result. That’s why the pros spend the big bucks on fast lenses.
This is also why the slower zooms perform poorly when trying to shoot sports or wildlife – the maximum aperture of such lenses is often 5.6 or worse so not only do you you get a slower shutter speed but the AF system struggles with detecting focus which such a ‘dark’ lens.
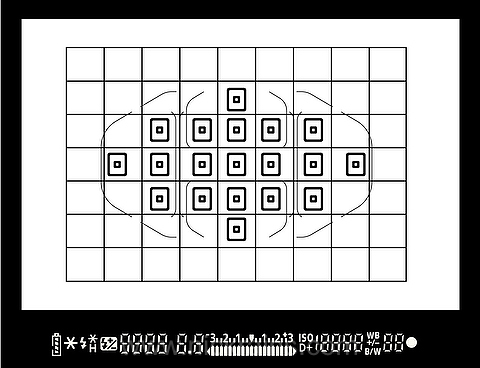
The cross-type sensor of, for example, a Canon camera detects contact in both horizontal and vertical directions.
4. Choose the focus point yourself.
I have yet to use a camera which is telepathic. How, otherwise, can the camera know where I want my point of focus to lie? By letting the camera decide which of the 45 or so focussing points to use I have given control to a mechanical device and I may or may not like the results. I prefer to choose my focus point and shoot accordingly. This is particularly true with wide aperture lenses with limited depth of field. Placing of the narrow focus point is part of the creative process and cannot be left up to the camera.
The exception to this is for fast moving subjects where you have focussing tracking turned on. As the subject moves in the frame, the multiple focus points can get a sense of the subject’s motion and make intelligent ‘guesses’ as to when the subject is likely to be when the next frame is fired off.
Most cameras have multiple focus sensors – as far as possible try to avoid letting the camera choose which one since you might end up focussing on the wrong thing.
5. Make sure your lenses are focussing where you think they are.
Many mid to high end camera allow a user-calibration of the focussing point. There are tools available to work with this feature to shoot an image using AF and then see if the actual shot is focussed where the AF intended it to be. If this is consistently off, then you can make slight adjustments in the camera’s menu and save a ‘correction’ specific to that lens. If you have this feature available, use it.
6. Use a tripod where possible.
If there is no subject movement, like in a landscape or studio still life, then keeping the camera rock solid will help you get critically sharp images. Even shooting at high shutter speeds is no substitute for a tripod for perfect focus – you are aiming for zero camera movement not minimal camera movement. Yes, I know carting a tripod can be a pain, but you will get a higher percentage of sharper images if you do take the trouble to use one.
Choose a decent tripod : a good head on modest legs is preferable to decent lens with a poor head. Small, lightweight tripods with flimsy tripod heads can be almost useless because they do not damp out any vibrations from the camera due to mirror movement.
I use Gitzo legs and Really Right Stuff heads.
7. Use the lens’s optimal apertures.
Most lenses, with the limited exception of the specialist top priced models, will have a ‘sweet spot’ aperture where the lens is performing at its best. This is usually somewhere between f4 and f11 depending on the maximum aperture of the lens. My Leica 90mm Summicron is as sharp at f2.0 as f5.6 but my EF17-40mm f4L is distinctly better at f8 than f4. Test your lenses yourself and see how they look at different apertures.
For maximum contrast and resolution, try to use this sweet spot as much as possible, you may be amazed at how good your lenses can be, even modestly priced one.
8. Beware of diffraction losses.
Diffraction error occurs when light passes through small ‘holes’ or in the case of photography, through a small aperture. It’s not a characteristic of lens design or quality, it’s a purely physical phenomenon, and ironically,, the finest lenses show up its effects more than cheaper lenses.
For most current sensors diffraction errors will reduce the lenses resolving power when you use an aperture of around f11 or smaller. Even f8 might show a fall off with the best lenses but in general, avoid f16 or f22 as a rule of thumb. The best way to see for yourself is to shoot a sequence of test images with lots of fine detail using all the apertures. It will be quite obvious that f22 is softer than f8, for example.
9. Take extreme care if hand holding.
The old rule of 1/60 second for a 50mm lens and 1/500 second for a 300-500 mm lens etc is still an okay guideline, but, given the unforgiving resolving power of modern sensors I’d suggest going one step higher in the shutter speeds, just to be safe. So, if I was shooting on a 24mm lens I’d try to shoot at 1/60 second and on my 300mm lens I’d try for 1/1000 second. I’d prefer to go up the ISO settings by one step to keep the shutter speeds up rather than risk a slightly soft image – better a little noise which can be dealt with than a soft shot which cannot be fixed.
10. Subject Movement.
Similar to hand holding which is concerned with camera movement, high shutter speeds also affect how the camera captures moving subjects. In this case a high shutter speed will, to a certain extent, freeze the subject’s movement. Experience will guide you here, the shutter speed you need will depend entirely on how fast the subject is moving relative to the frame. If you are tracking the subject, keeping it more or less centred in the frame, then a modest shutter speed may well suffice, but if the subject is passing through the frame very quickly then a shutter speed of 1/2000 second or higher might be needed.

Choosing a high shutter speed will freeze both subject and camera movement. Canon 60D 300f2.8L 1/2000 second @ f4 ISO200