Black and White Photography
Black and White photography takes us back to our roots in the world of photography, but at the same time nothing could be more contemporary. Black and White is something almost entirely unique to photography as an art form in that it allows us to extract the texture and shape from an image and leave behind the distracting colours. Given that we don’t naturally see in Black and White (except at night) I am constantly amazed at how easily we interpret such images and what’s more, how there is still a cachet of ‘artiness’ about the medium.
Art or snapshot, it’s actually very easy to shoot Black and White (B+W) images these days, in fact never has it been easier. Gone, almost, are the days of darkrooms and smelly chemicals. Now we have computers!
Cameras and computers don’t care whether an image is made up of Red, Blue and Green pixels. It’s all just maths and numbers to them. If the values of R,G and B in an image are equal then we have a grey – no colour, just a density between pure Black (0,0,0) and White ( 255,255,255).
This is known as Greyscale and is simply a range of tones with no colour to them. Perversely, you can also have B+W images that do have colour – think of old photos with that lovely sepia tone that evokes nostalgia and heritage. That’s a monochrome image, one colour, just not grey, and again, that’s easy for us to create in our digital cameras of computers.
There are three main ways to create B+W Images.
This is the traditional way – go to an antique fair, buy a film camera and a set of old darkroom equipment. You can still buy B+W film like the classic Ilford HP5 and FP4 35mm films that I used to use these thirty years ago! and Ilford still make B+W papers to print onto.
I’m only slightly joking here – traditional B+W photography has become a niche hobby, but still one pursued by many traditionalist simply because they like the whole mystery of developing trays and red-lit rooms. If you like vinyl records over MP3s then you are a candidate for chemical photography!
2. This is the easiest way – just set your camera to shoot in B+W. Most compact cameras will have this in the menu somewhere – often in the Scene Modes or Creative Modes. My Canon G15, reviewed last issue, has a B+W and a Sepia Mode. This will change the view on the back of the camera to reflect the new monochrome look so you will see exactly what you are getting. It couldn’t be easier.
My Canon 60D, a mid range DSLR takes it further and offers a Monochrome ‘Picture Style’ and options for ‘coloured filters’. Why are coloured filters useful? Well, back in the day, if you wanted to capture those classic dark contrasty skies on film you need to use a Red filter over the lens to filter out the Blue light. This makes Blue skies look darker and gives you that wonderful Ansel Adams effect. Similarly, a Green or yellow filter can make green foliage look lighter and darken skies a little too. This can be a nice look, a little like Infrared, just less extreme. The coloured filter settings in the menus of modern digital camera simply emulates this effect.
One quirk of digital cameras – if you shoot in raw mode, the B+W mode will not give you B+W raw files, they will stay in colour. But, the preview on the back of the camera WILL look B+W which is handy if you want to see if a subject will work in B+W. Also, if you shoot raw+jpeg you’ll get a colour raw and a B+W jpeg. That’s having a bet both ways!
3. This is the most sophisticated way – you can shoot colour in-camera and convert to B+W later in the computer.
In many ways this is the best method because you are not closing off any doors by throwing away the colour permanently and, better still, you have a LOT more control in software such as Lightroom or Photoshop.
In Lightroom you can simply click the B+W Treatment at the top of the Basic Panel in the Develop Module. In Photoshop, the conversion will be found under Image / Adjustments / B+W and in Photoshop Elements it’s under Enhance / Black and White Conversion. Other software will have equivalent tools, and some specialises in B+W conversions, such as NIK Silver FX.
Not all subjects make good B+W images. Subjects with strong shapes and textures work best, sometimes strong colours compete for attention with strong shapes and the result is confusing. Try to establish what it is in the shot that is most important – if it’s the colour then fine, work with that, but if the colour is not as important as the texture or shape then that might be a good candidate for a B+W conversion.
Printing B+W images is no different from printing colour images. The printer just uses the numbers sent to it by the computer and if they are numbers for a neutral image with no colour then it will just print that. Some Epson printers have a dedicated Advanced B+W mode which works very well but is not always necessary. I have found that Canon printers, especially the Pro-1, Pro-10 and Pro-100 printers do a wonderful job of laying down a B+W image with no hint of a colour cast.
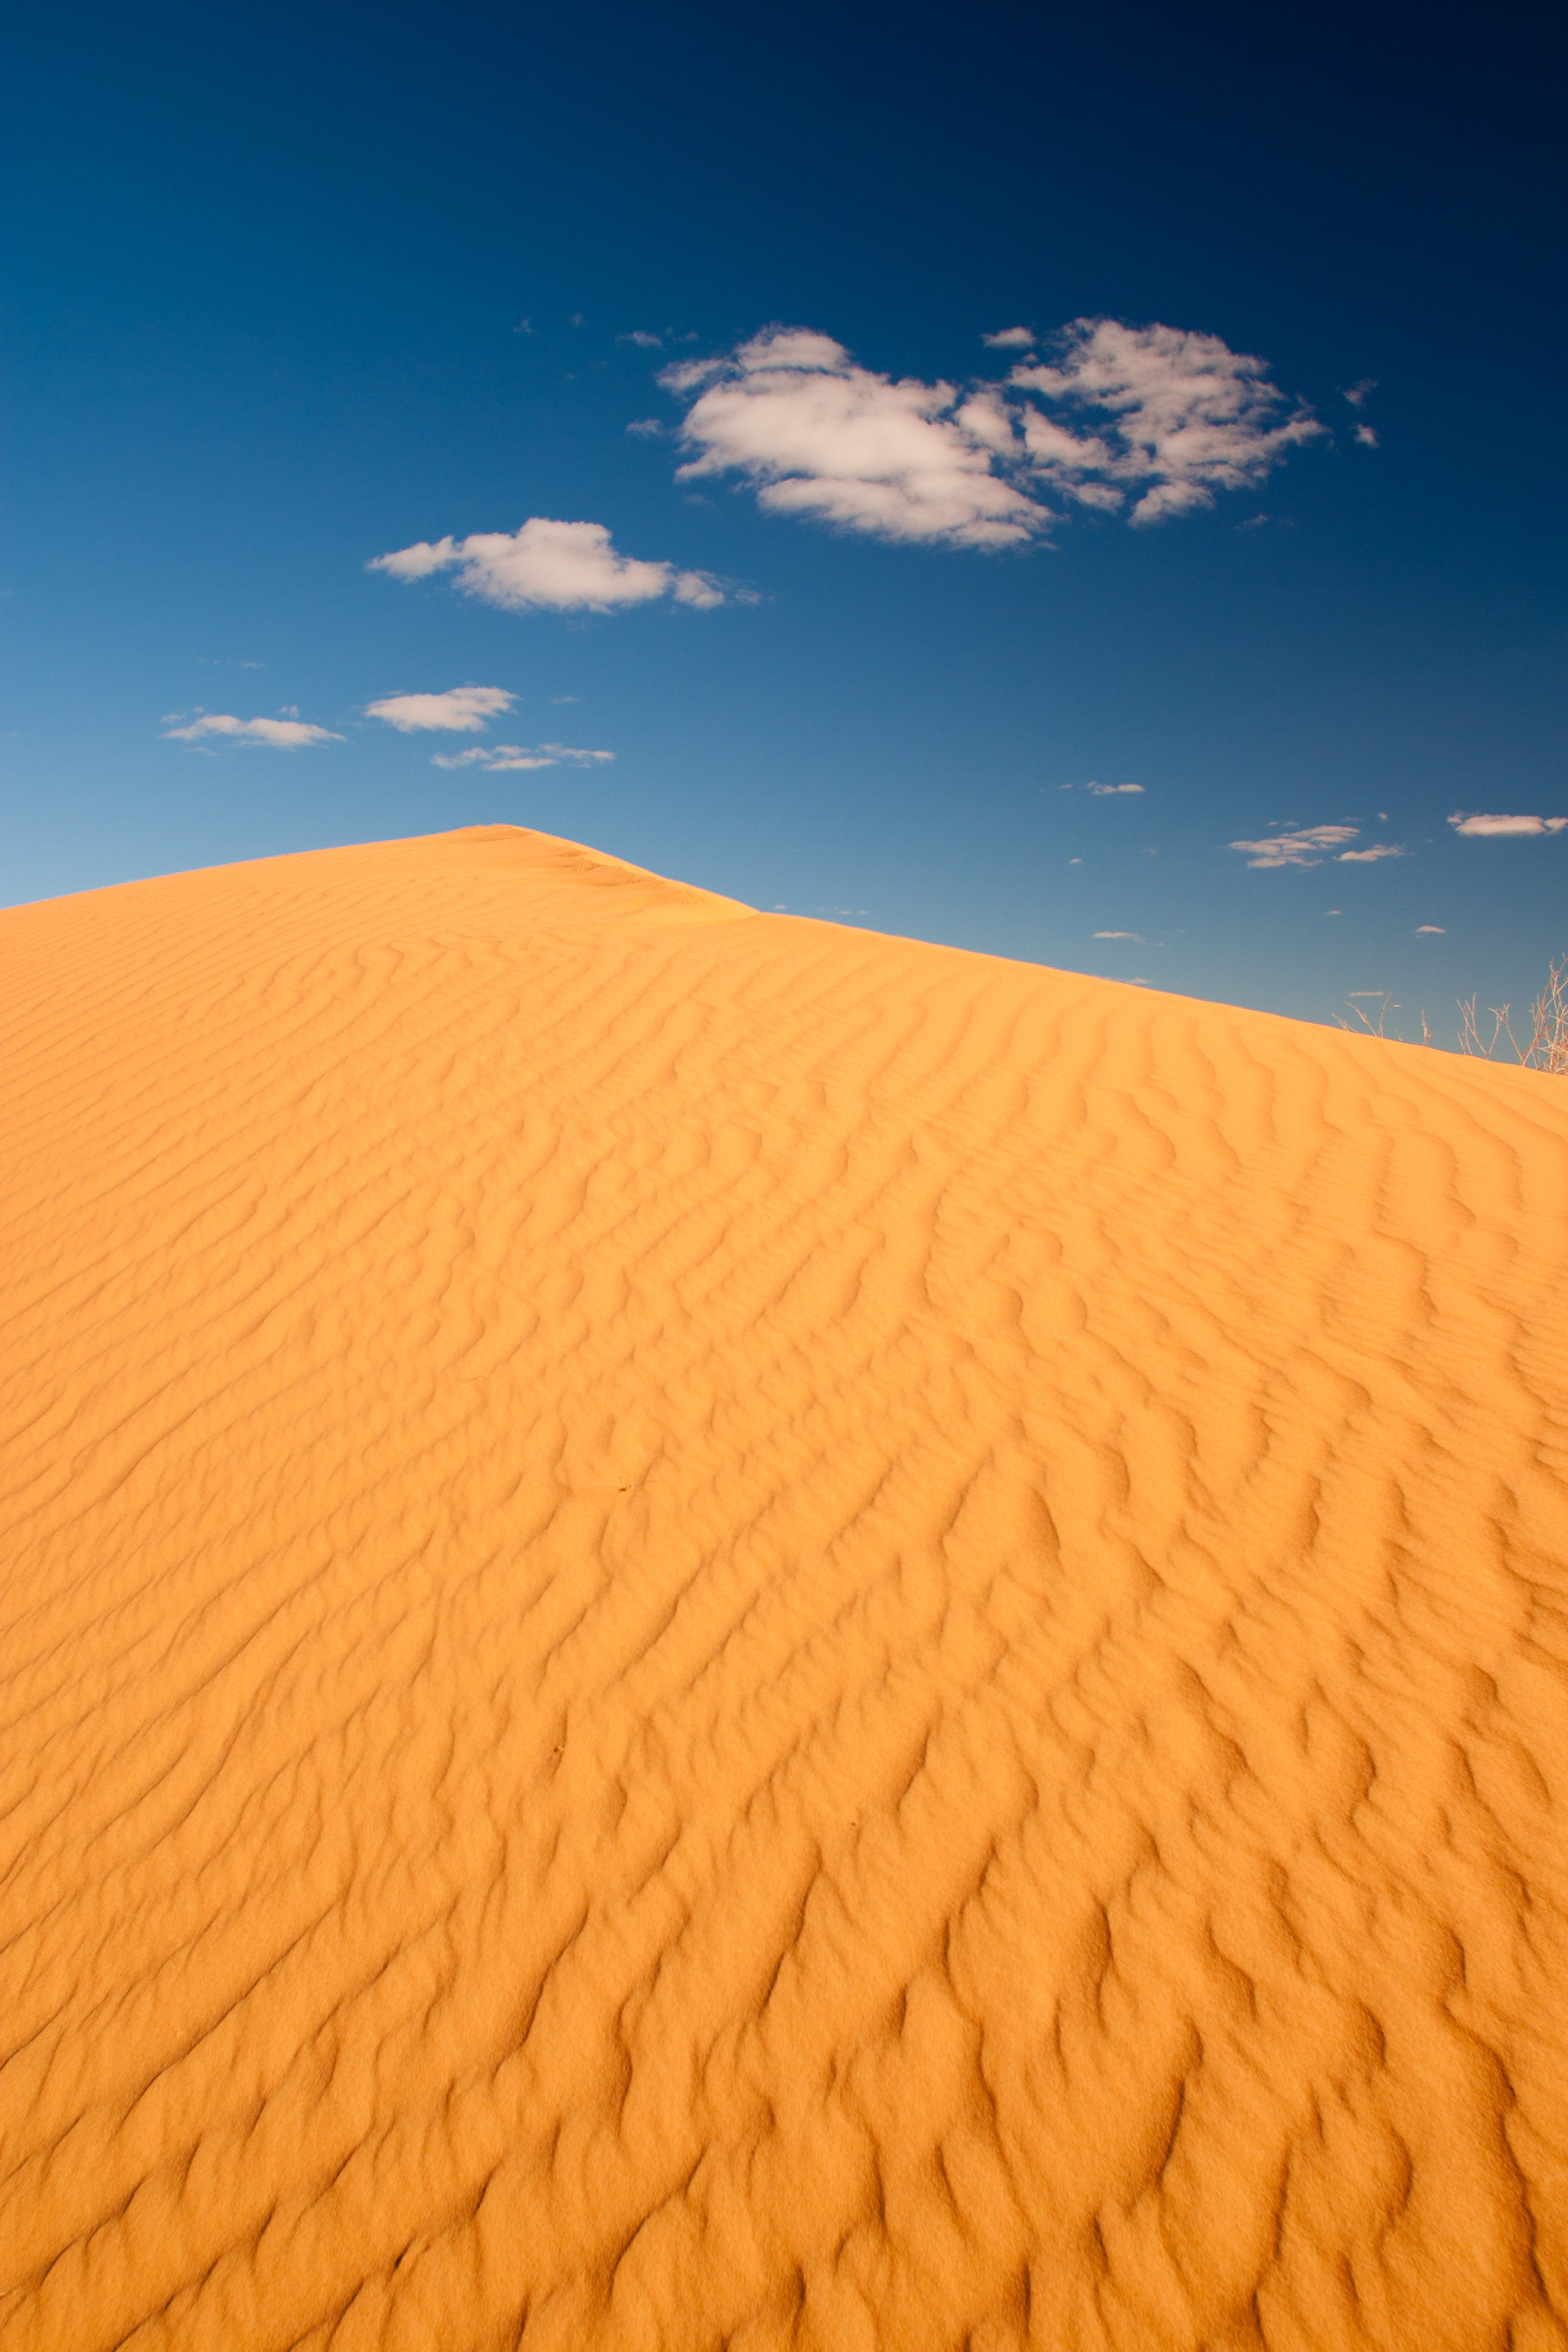
colour
red filter
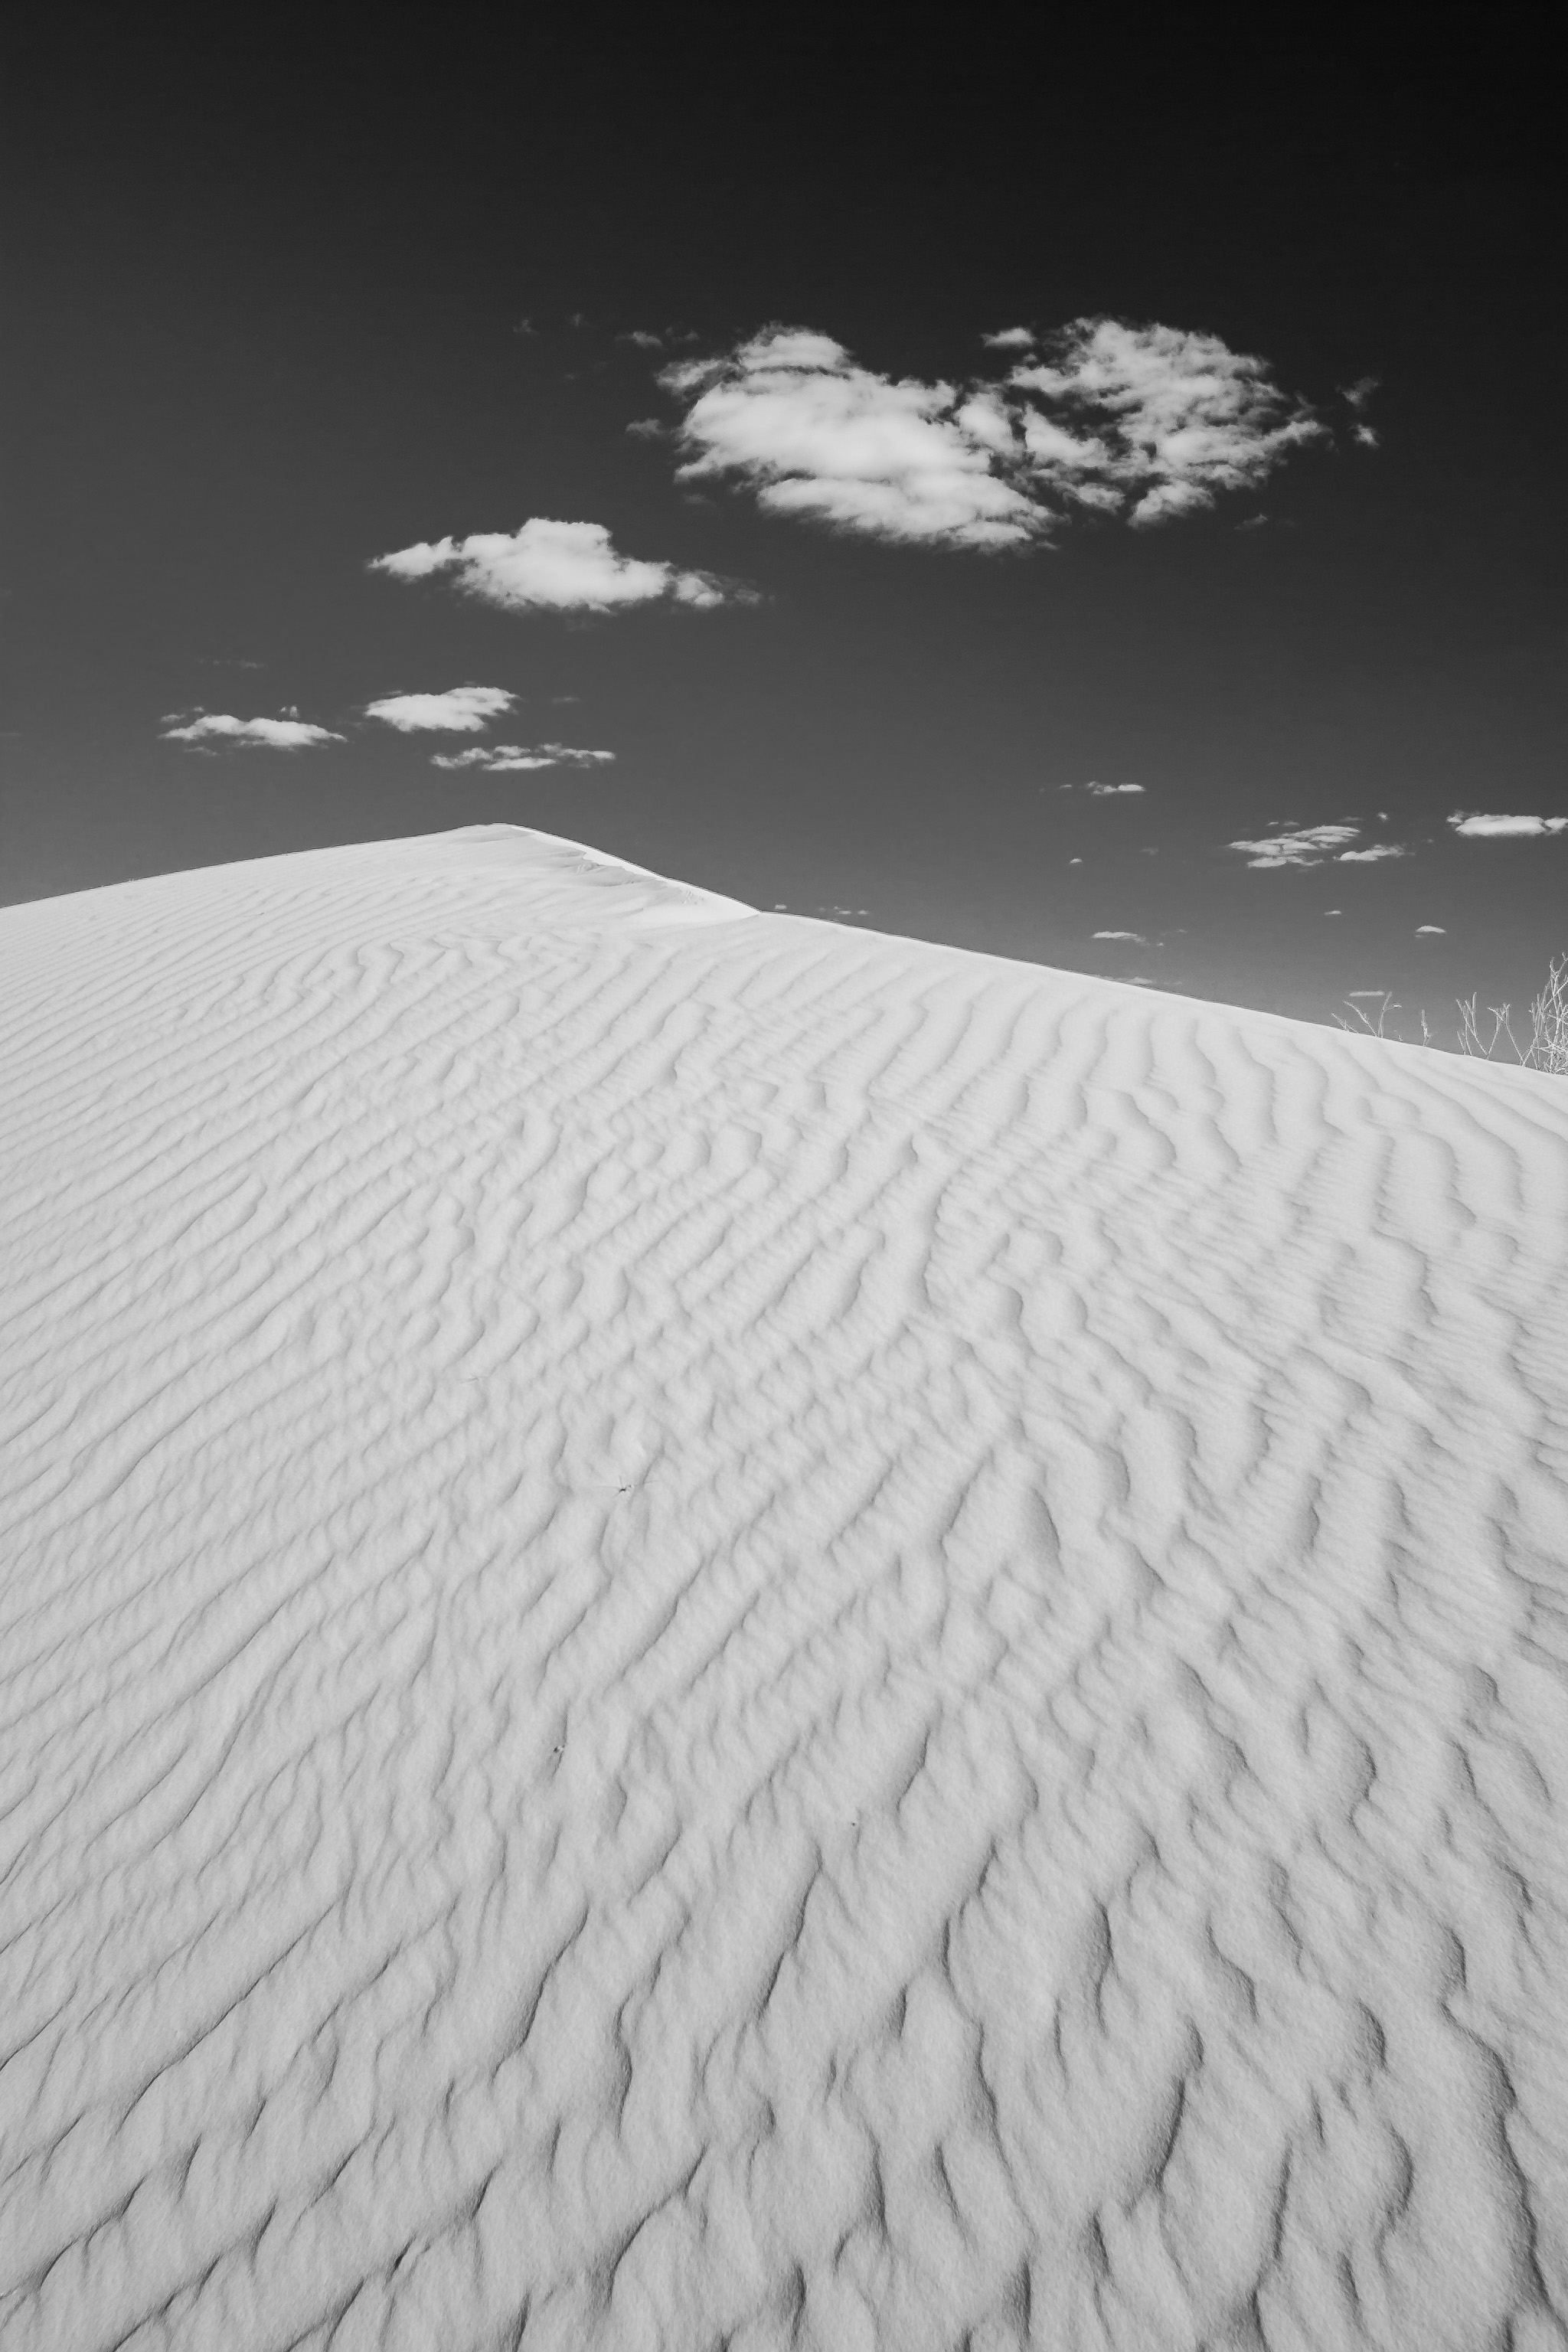
monchrome
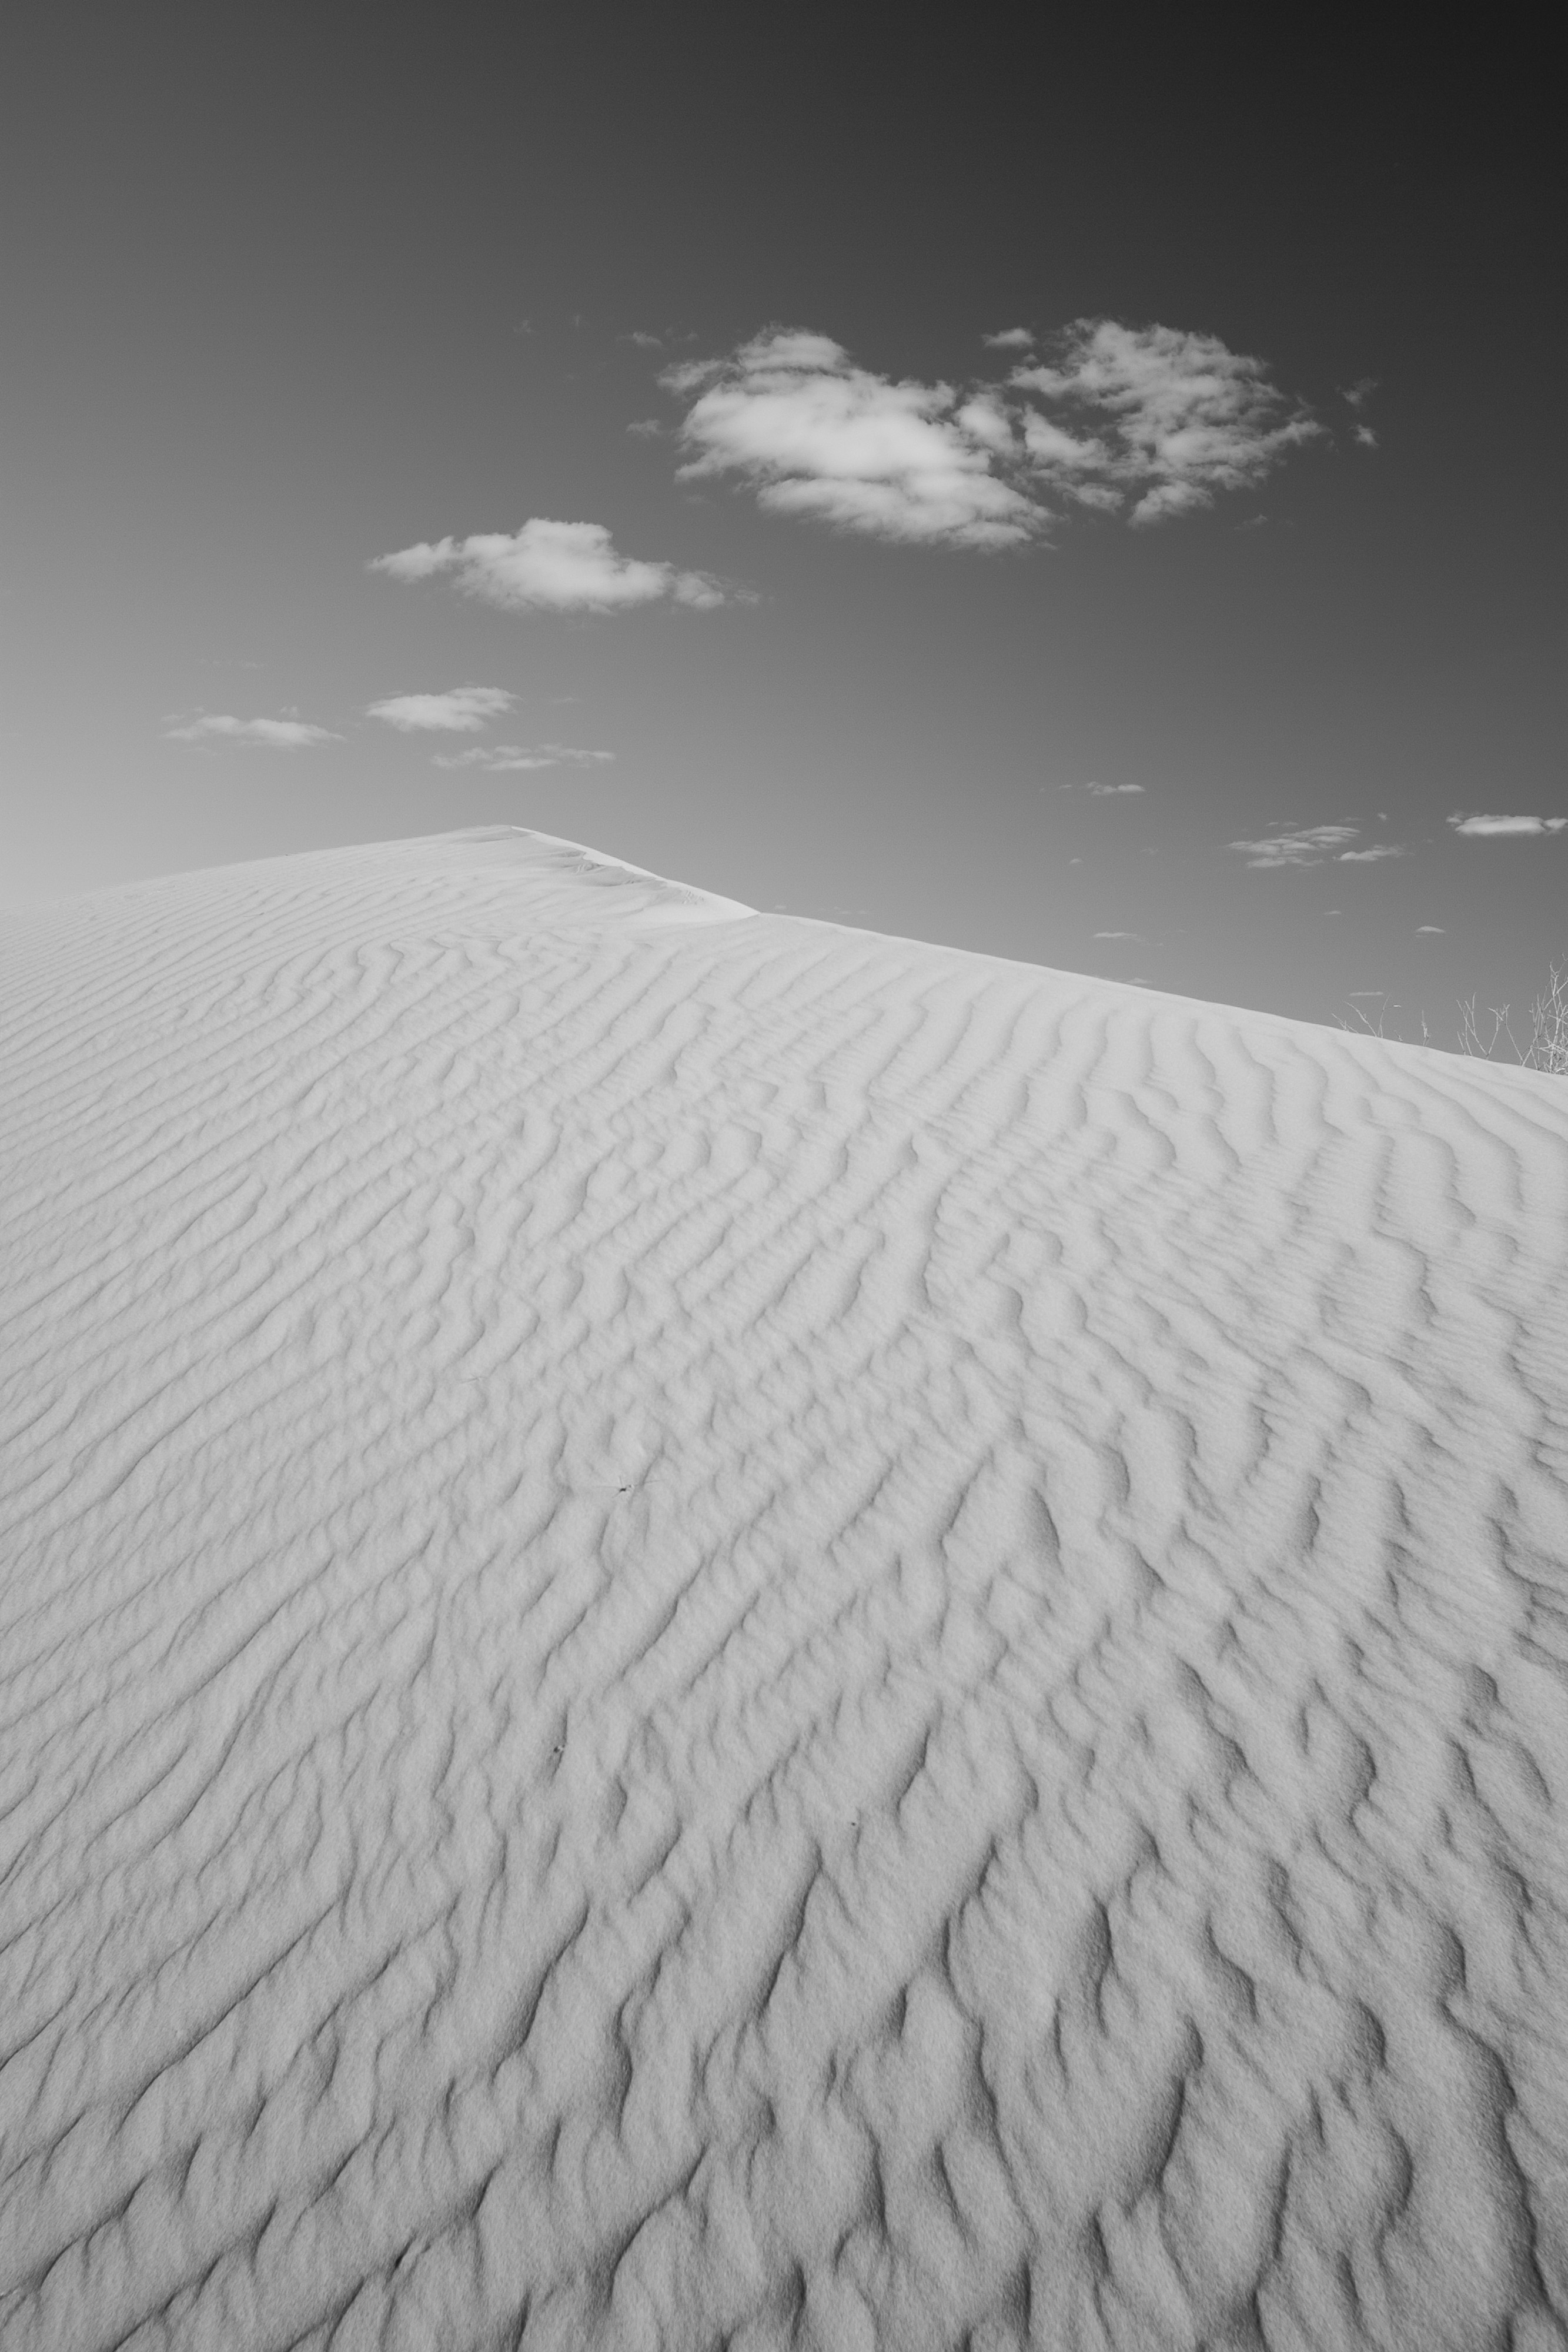
In colour the red of the Simpson Desert dunes contrasts deeply with the blue sky. Using the Monochrome setting in a DSLR and choosing the Red Filter option maintains this contrast by darkening the sky and lightening the sand. Without the filter, the blue and the red tend to blend into one another.
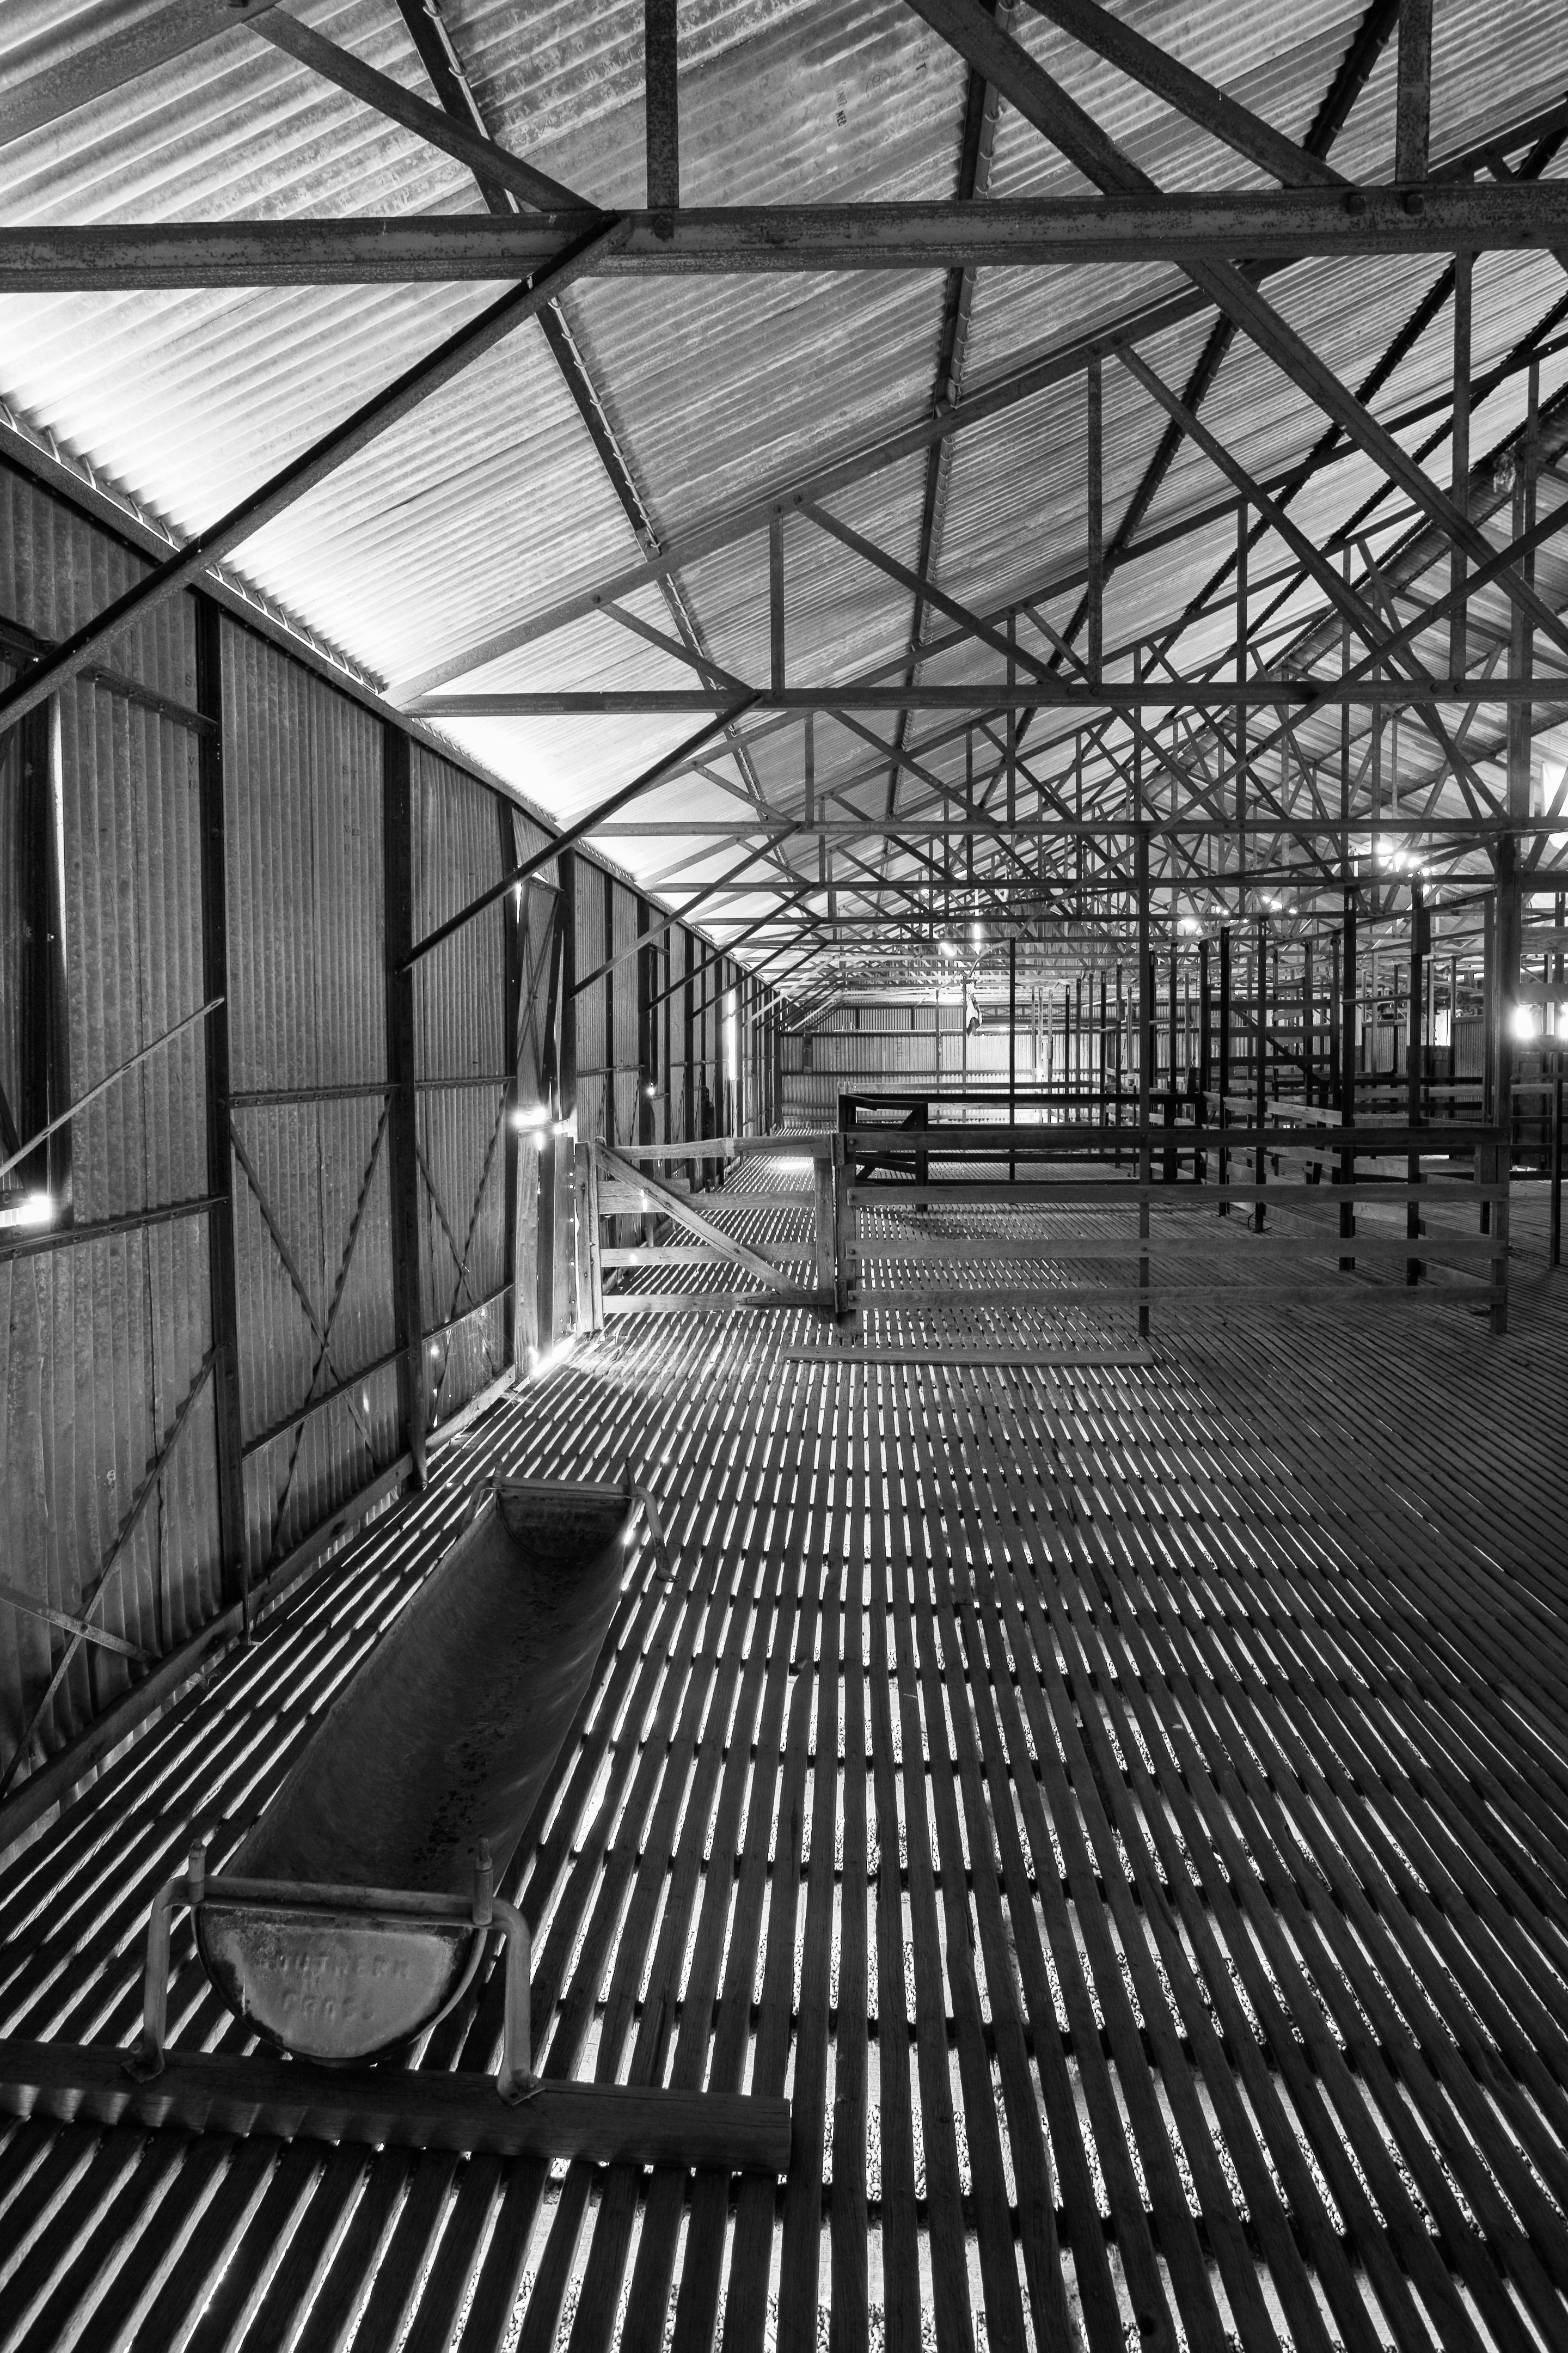
Shearing Shed on Muggon Station, WA. Because the shed is all one colour inside (a warm timber colour), it makes a good candidate for B+W.
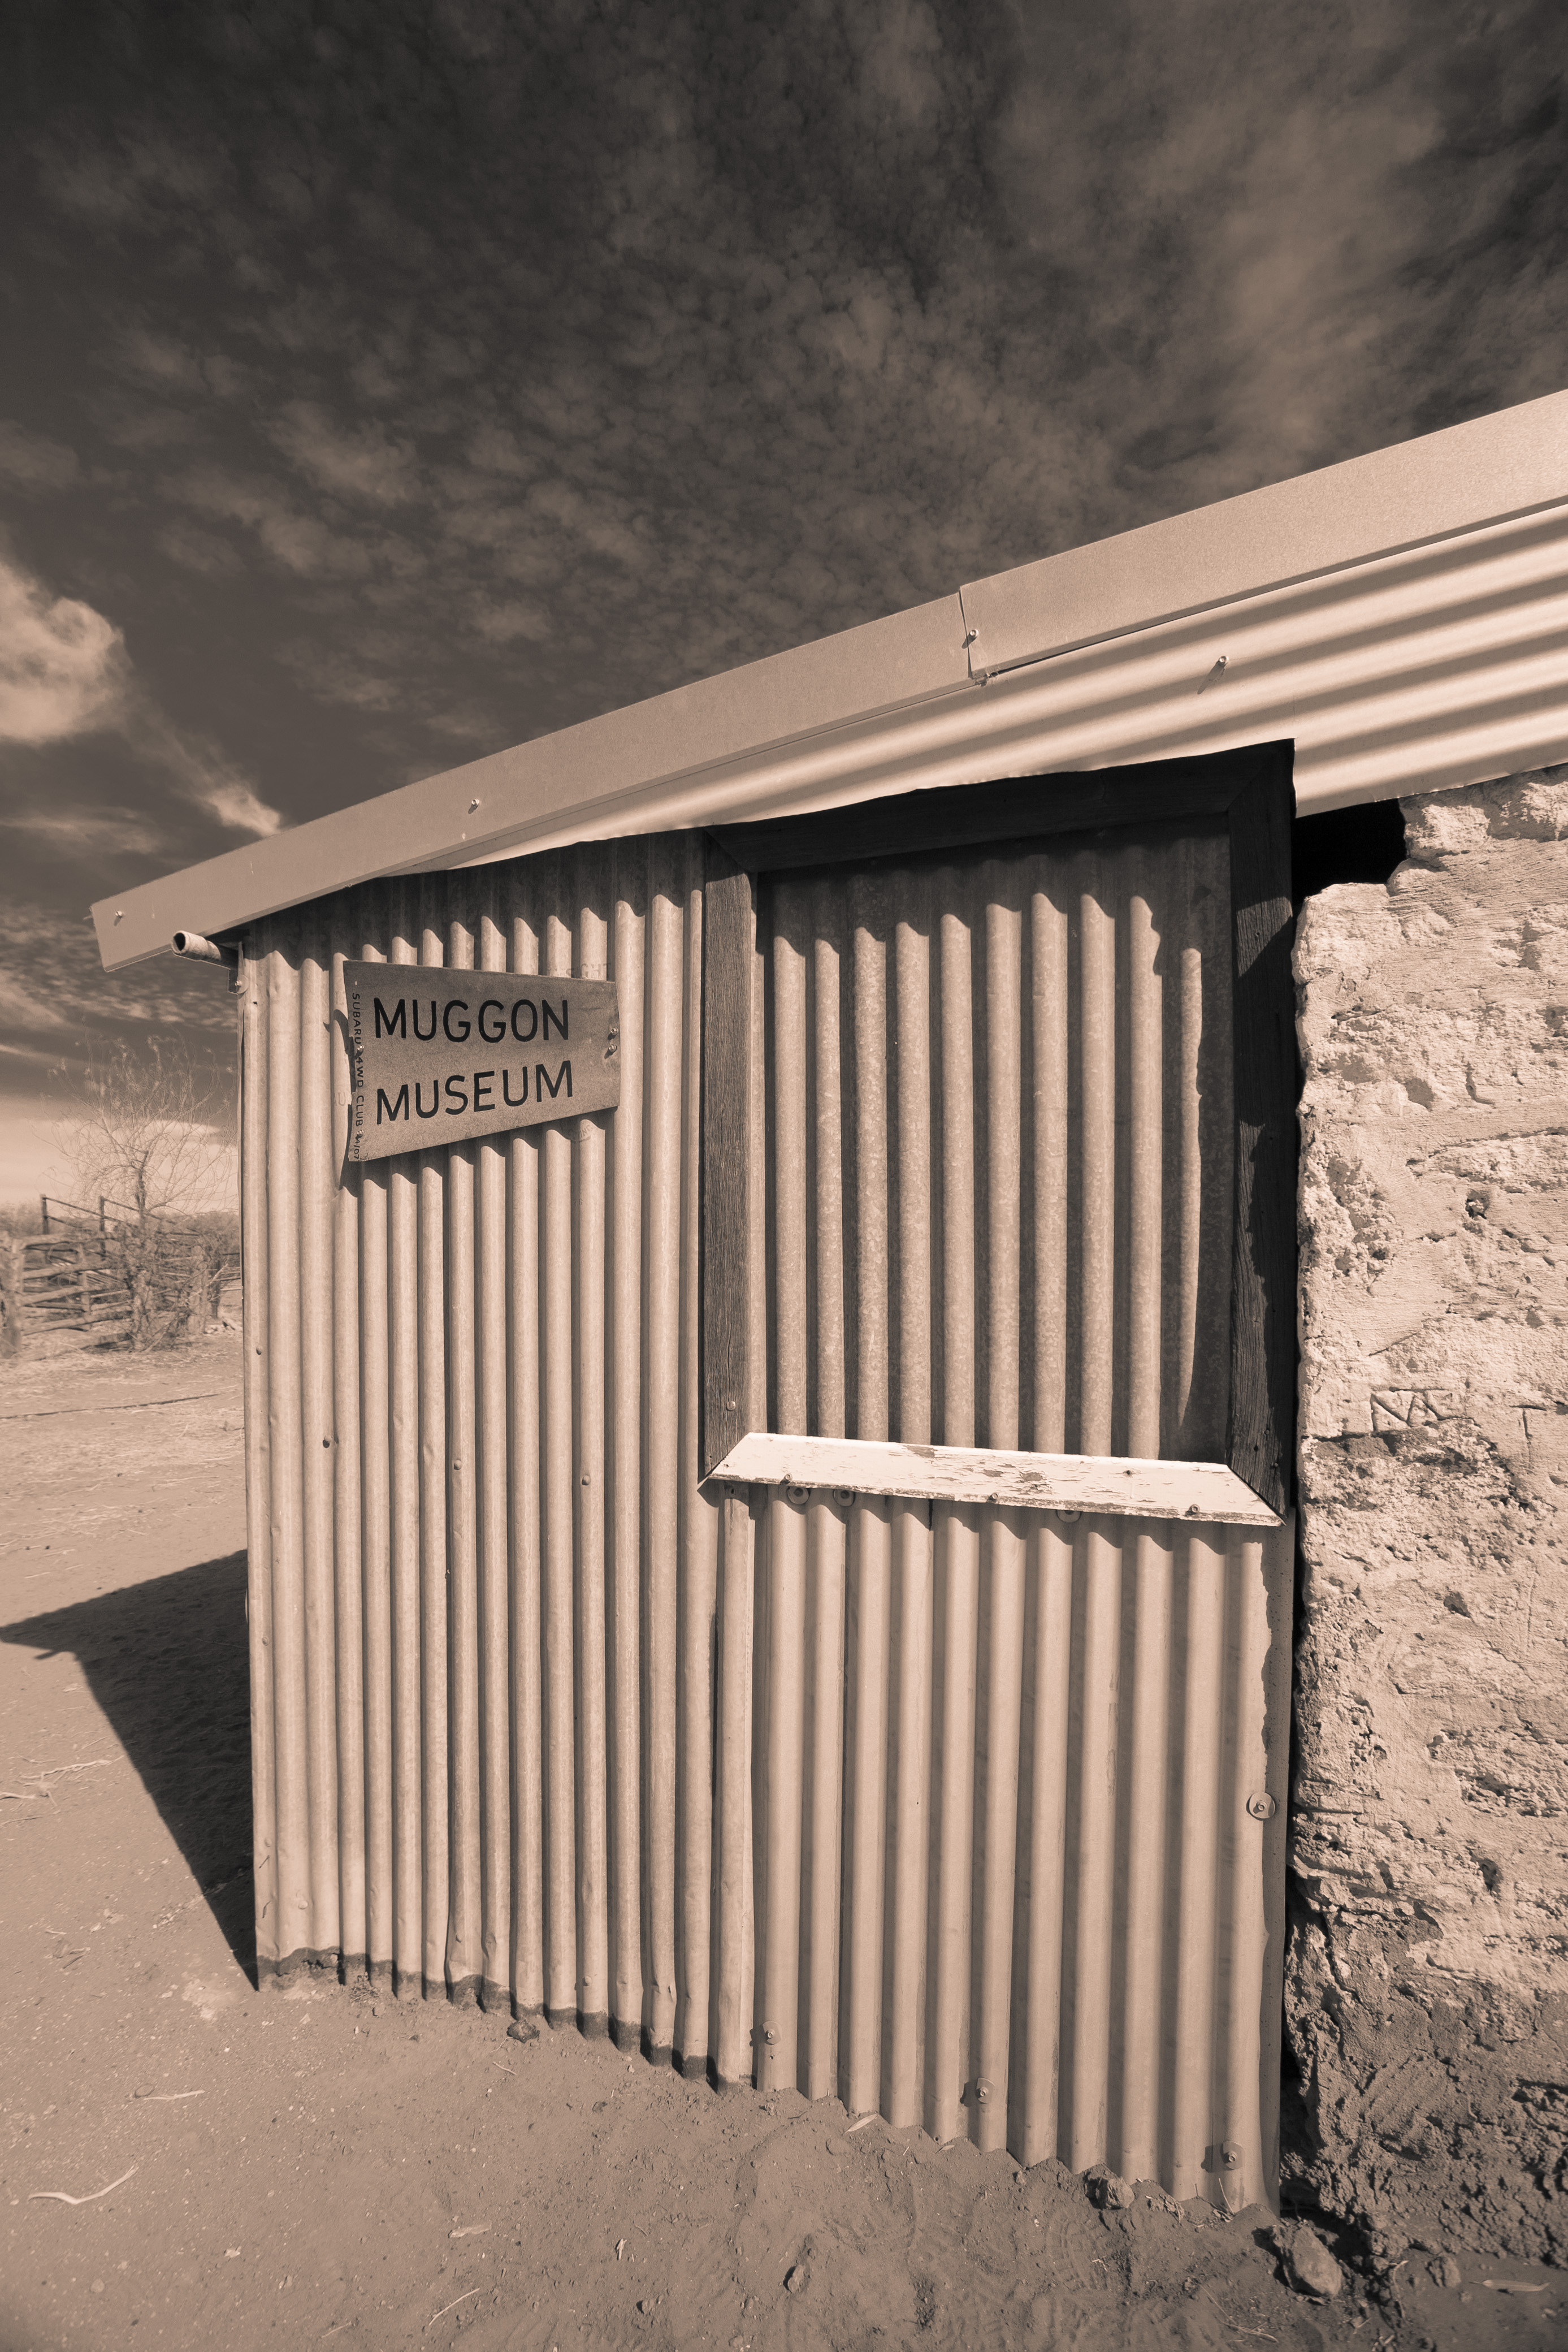
Muggon Station – the sepia setting in the camera options lends this shot the feel of an old faded photo.
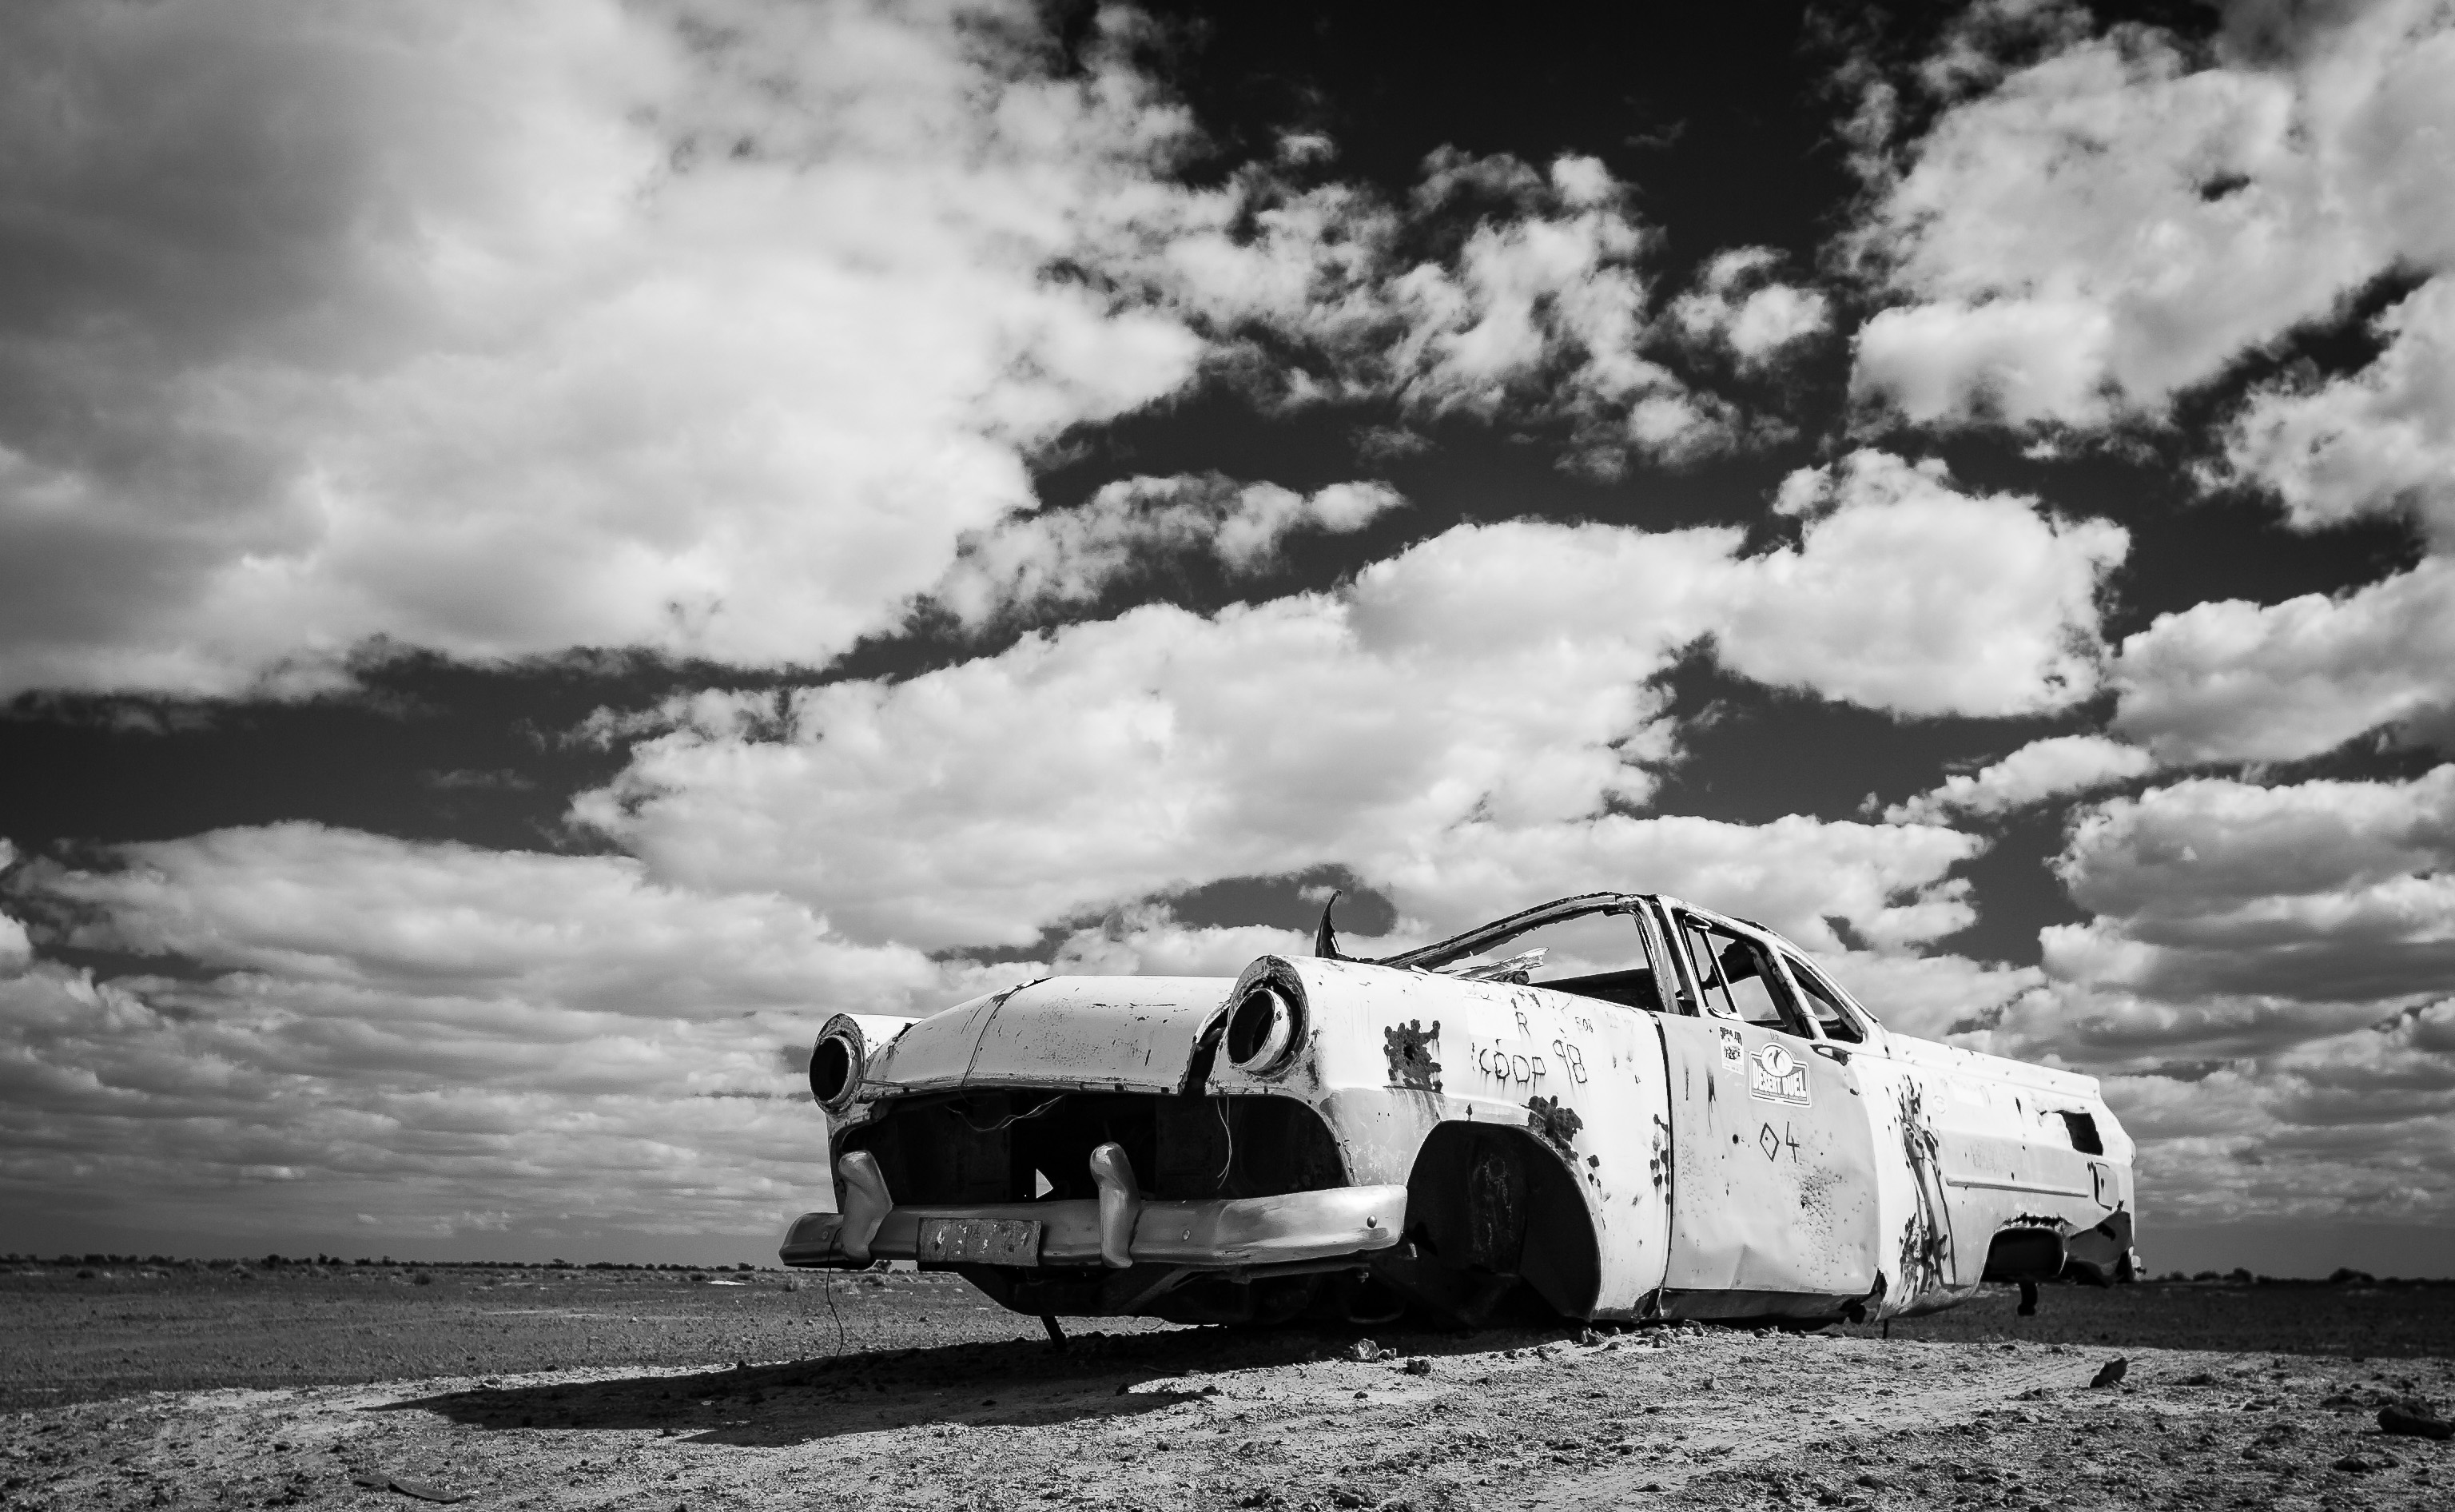
On the Birdsville Track. Skies can be given loads of drama with a contrasty B+W conversion in the computer.
‘Beaver’ Blackall Woolscour, QLD.
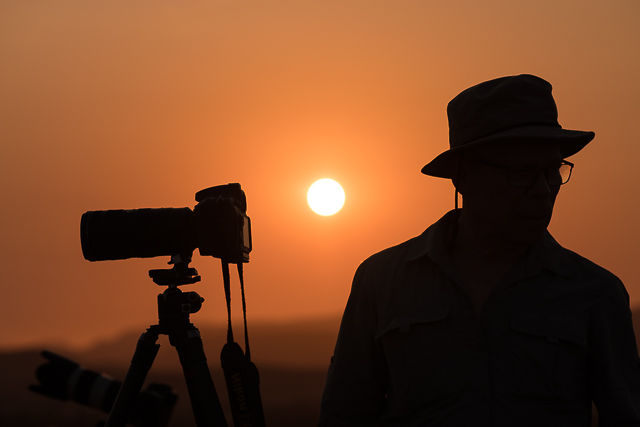
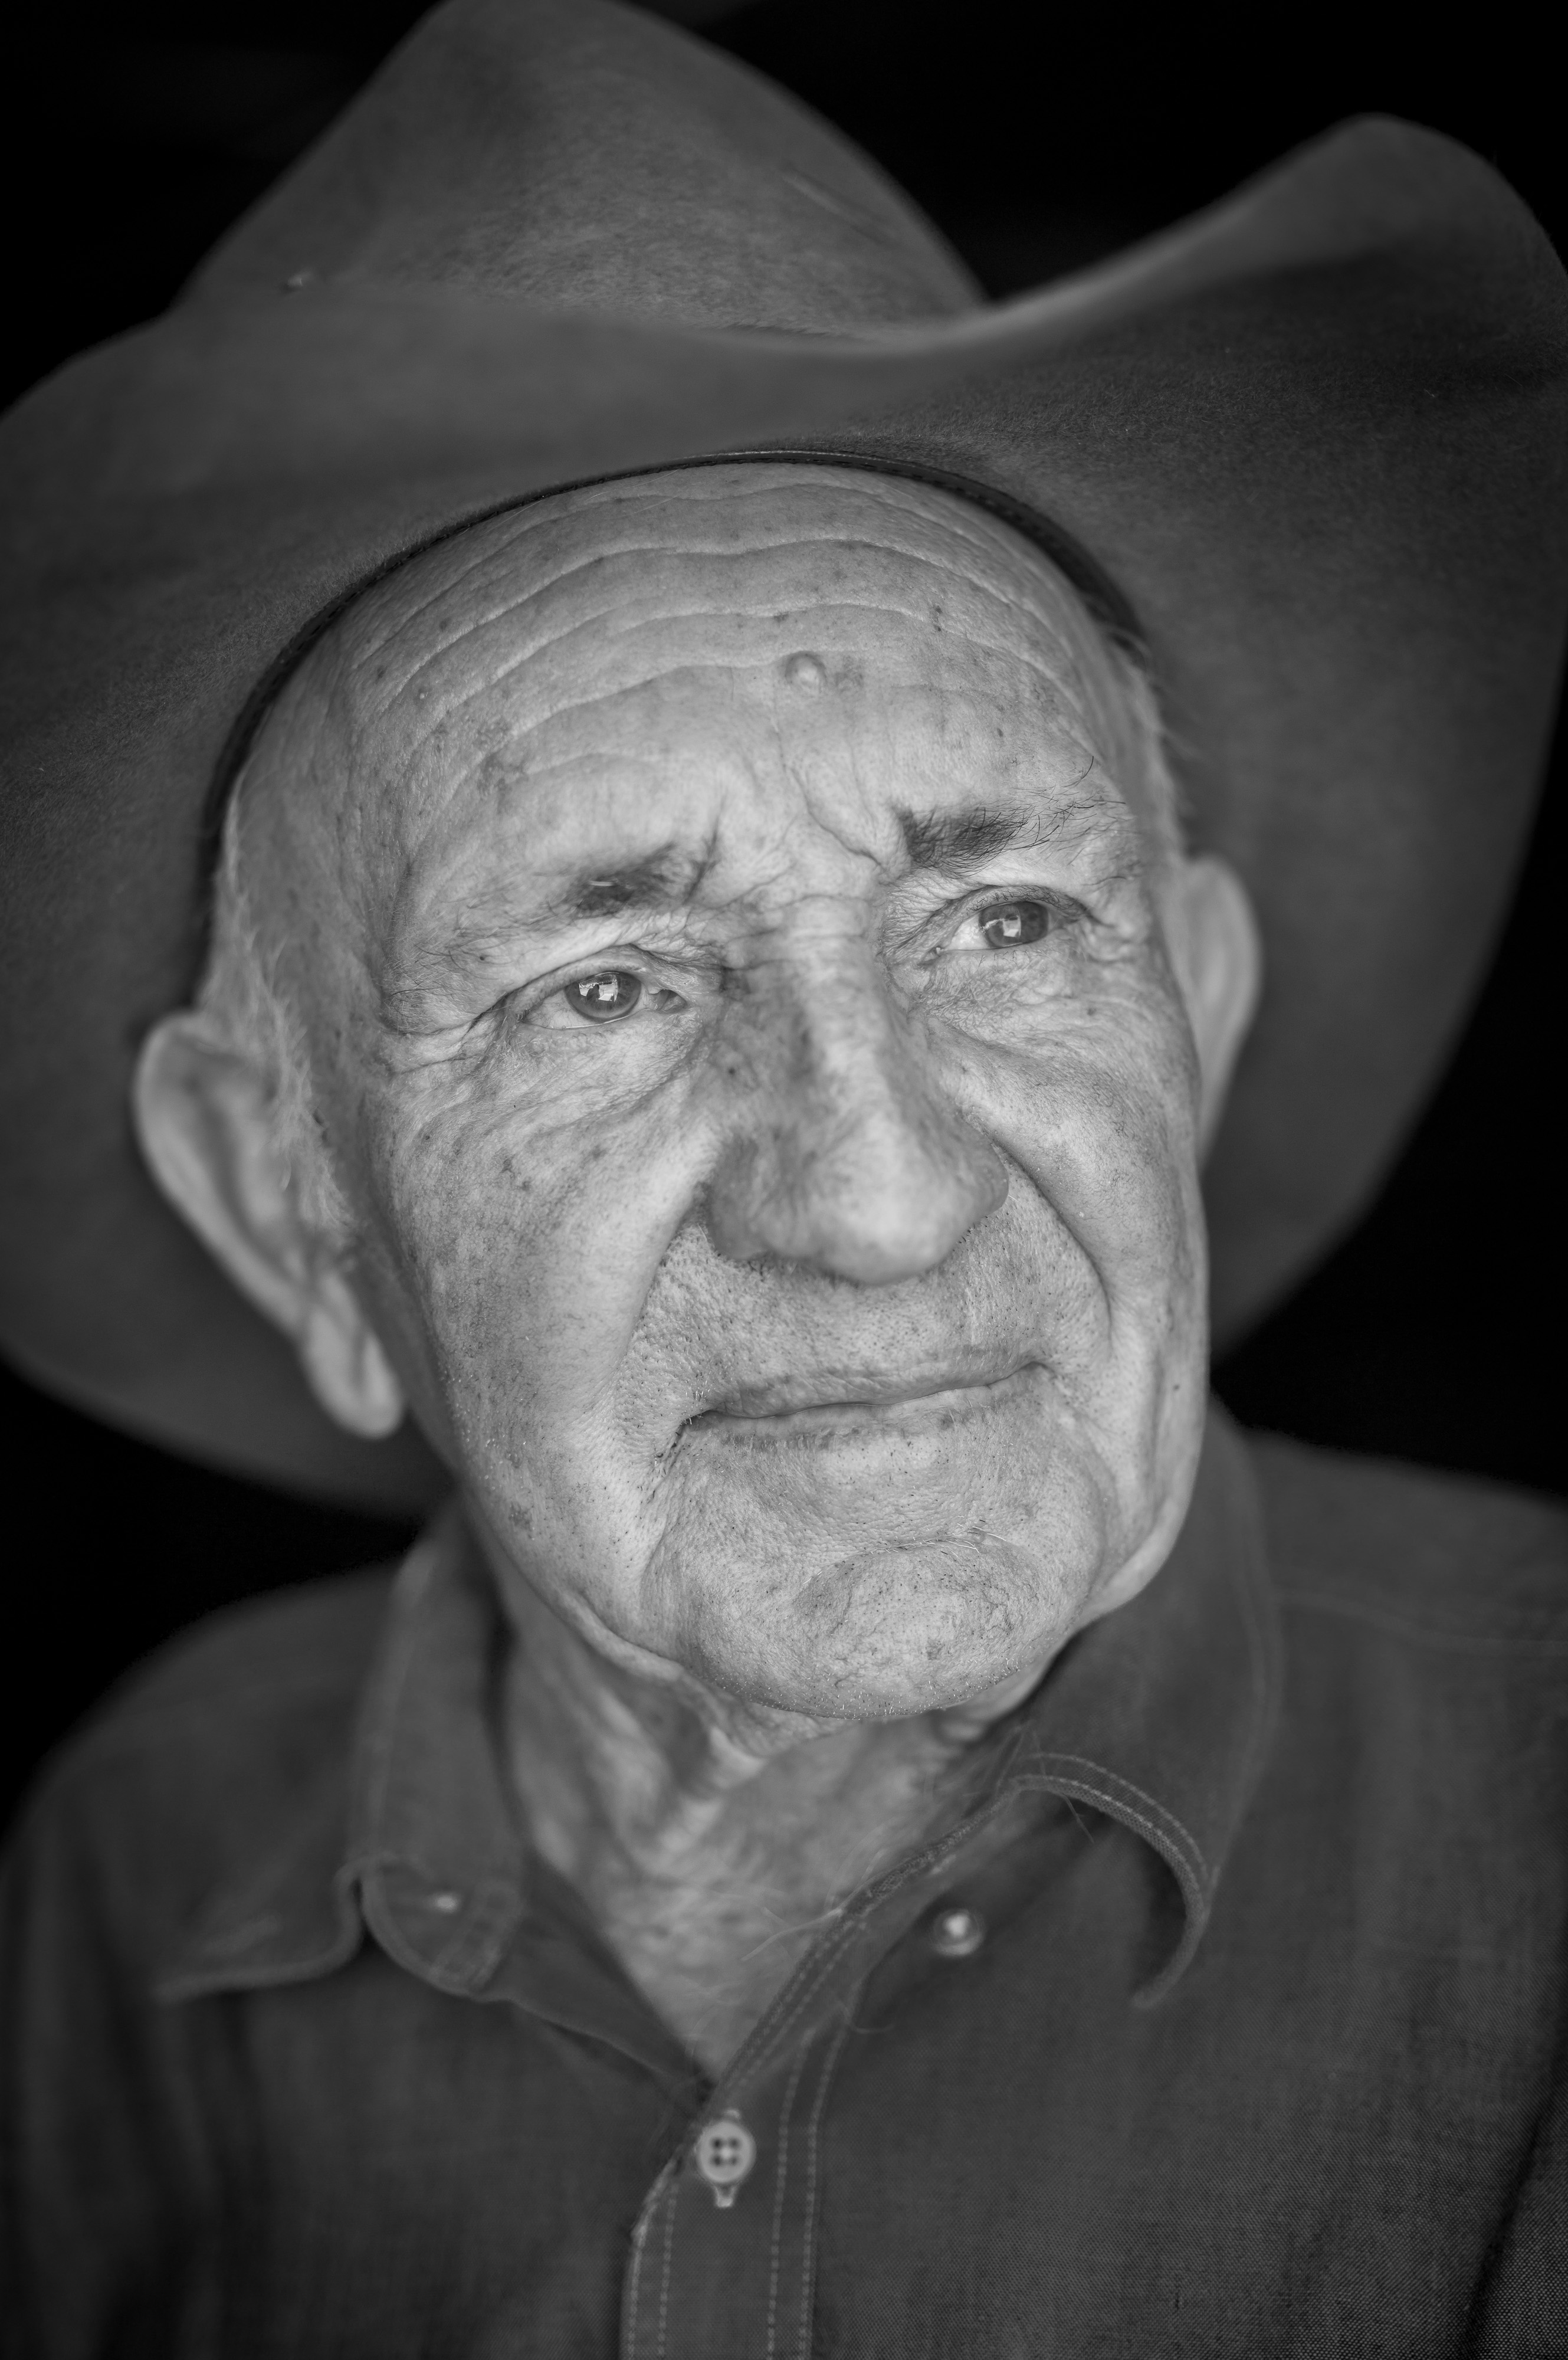
Outback characters make great subjects for portraits in B+W.